REST API
Generated frontend clients use Generic REST API. The detailed documentation on the API endpoints is published here.
CUBA REST JS library is used to communicate with Generic REST API. Documentation and API reference can be found here.
Security Setup
New version of CUBA Platform contains separate security scopes for REST API and Generic UI.
The REST API add-on defines its own REST scope,
so when you add the add-on to the project, you should configure a separate set of roles
for users logging in to the system through the REST API. If you don’t do it, the users will not be able to login
via REST because they won’t have any permissions including the cuba.restApi.enabled specific permission.
Universal REST API provides powerful means to deal with arbitrary data from domain model without creation of custom REST endpoints. However, if you enable the REST API in your application, you must configure security (Roles/Access Groups) and always keep it in actual state on a production system in order to prevent access to some sensitive data.
Configure REST API Role Using Administration UI
Create a Role with REST Access
| Version 7.2.1+ of REST API add-on already contains default role rest-api-access so you can skip adding Specific permission: REST API and assign this role to user instead. Anyway entity and attribute permissions still need to be added in separate role, because default rest-api-access role is readonly. |
-
Log in to Generic UI and open .
-
Create
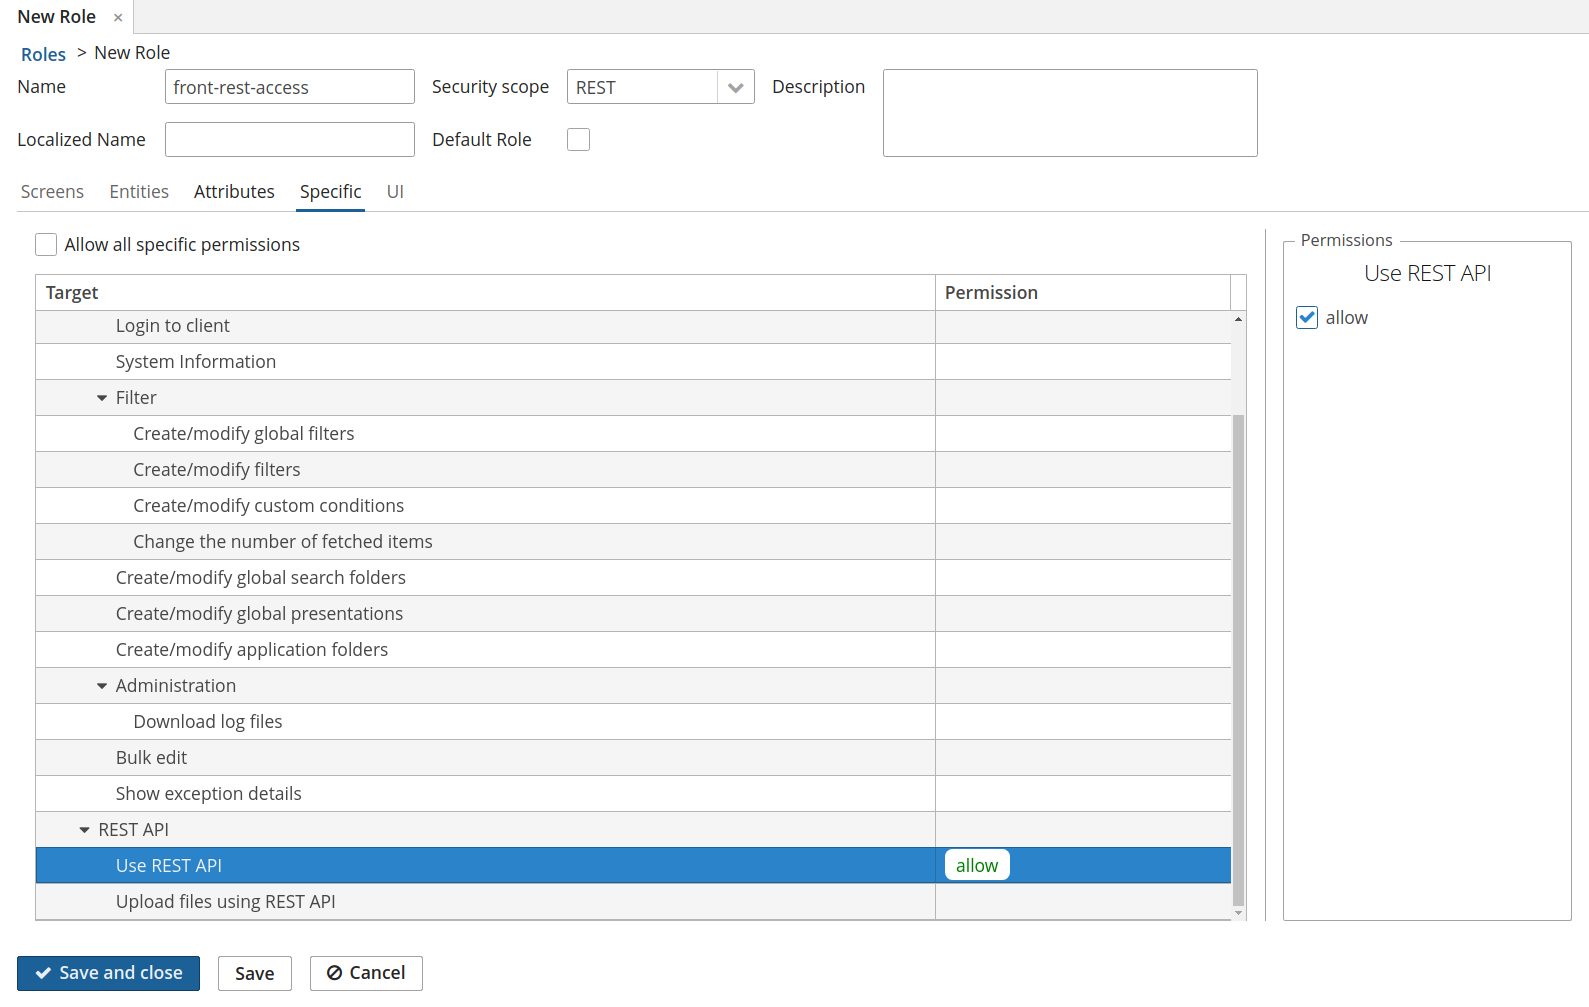
front-rest-accessrole with properties specified below.
Security scope |
REST |
Specific permission |
REST API → Use REST API = allow |

| If you are going to transfer files over REST API, specific permission REST API → Upload files using REST API also should be set to allow. |
Assign a Role to a User
Assign role from previous step to all users, that should have access to frontend app.
-
-
Select user, press Edit
-
Add role
Add Entity and Attribute Permissions to Role
After REST access role is assigned to user, user can login to frontend app, but still has not enough permissions to work with entities.
To add entity permission:
-
Open
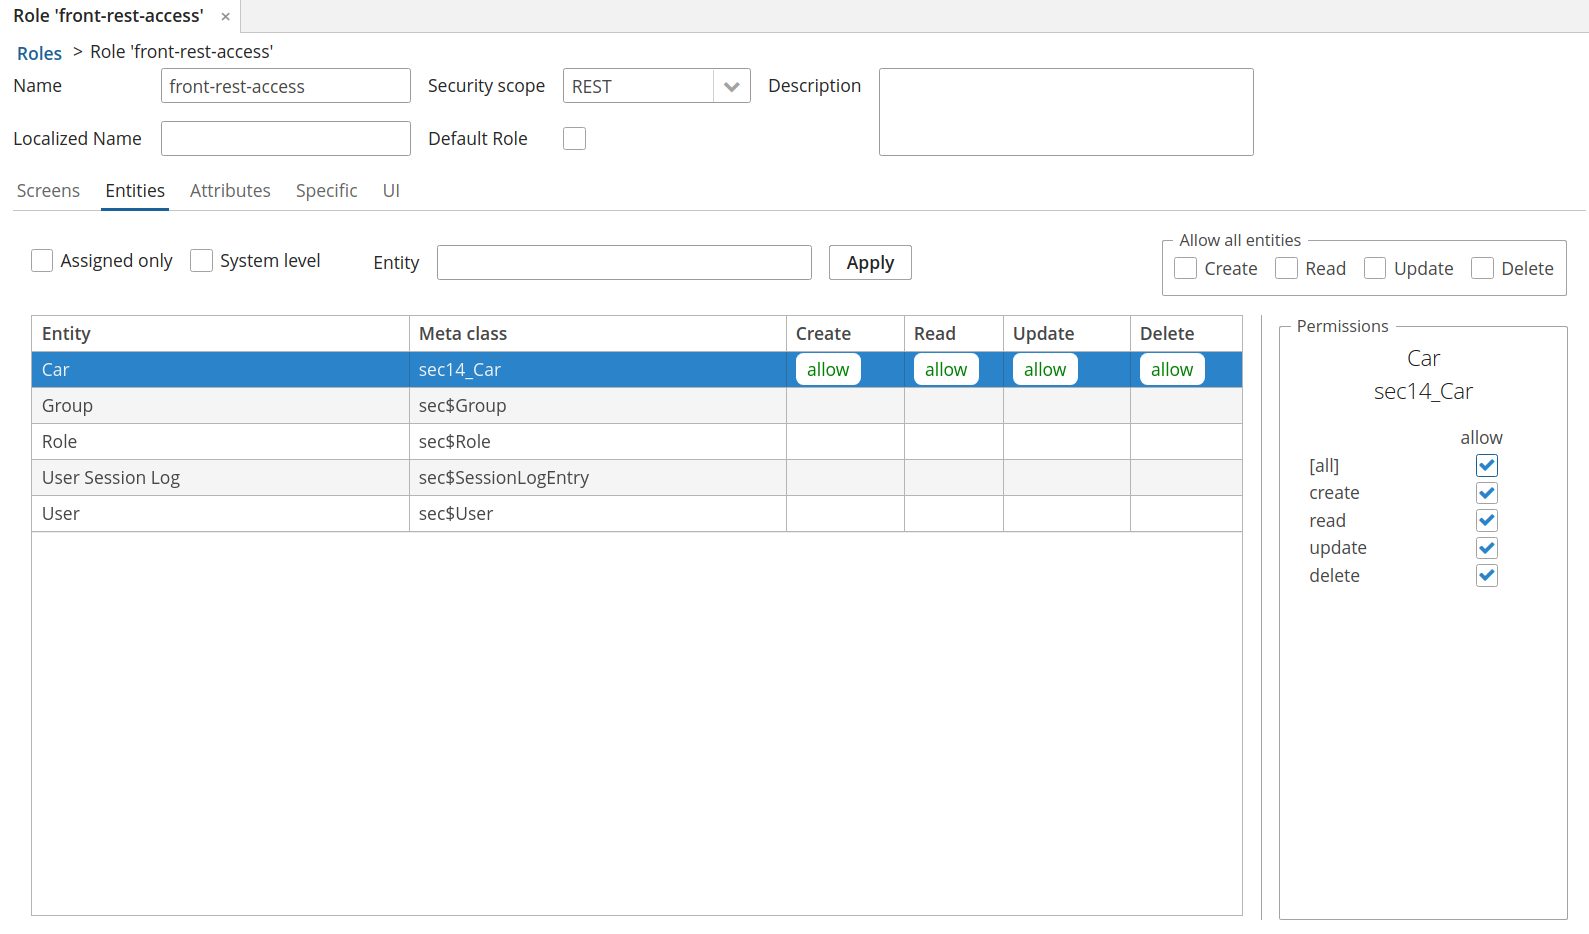
front-rest-accessrole edit screen, click on Entities tab. -
Select entity and permissions.

To add entity attributes permission:
-
Open
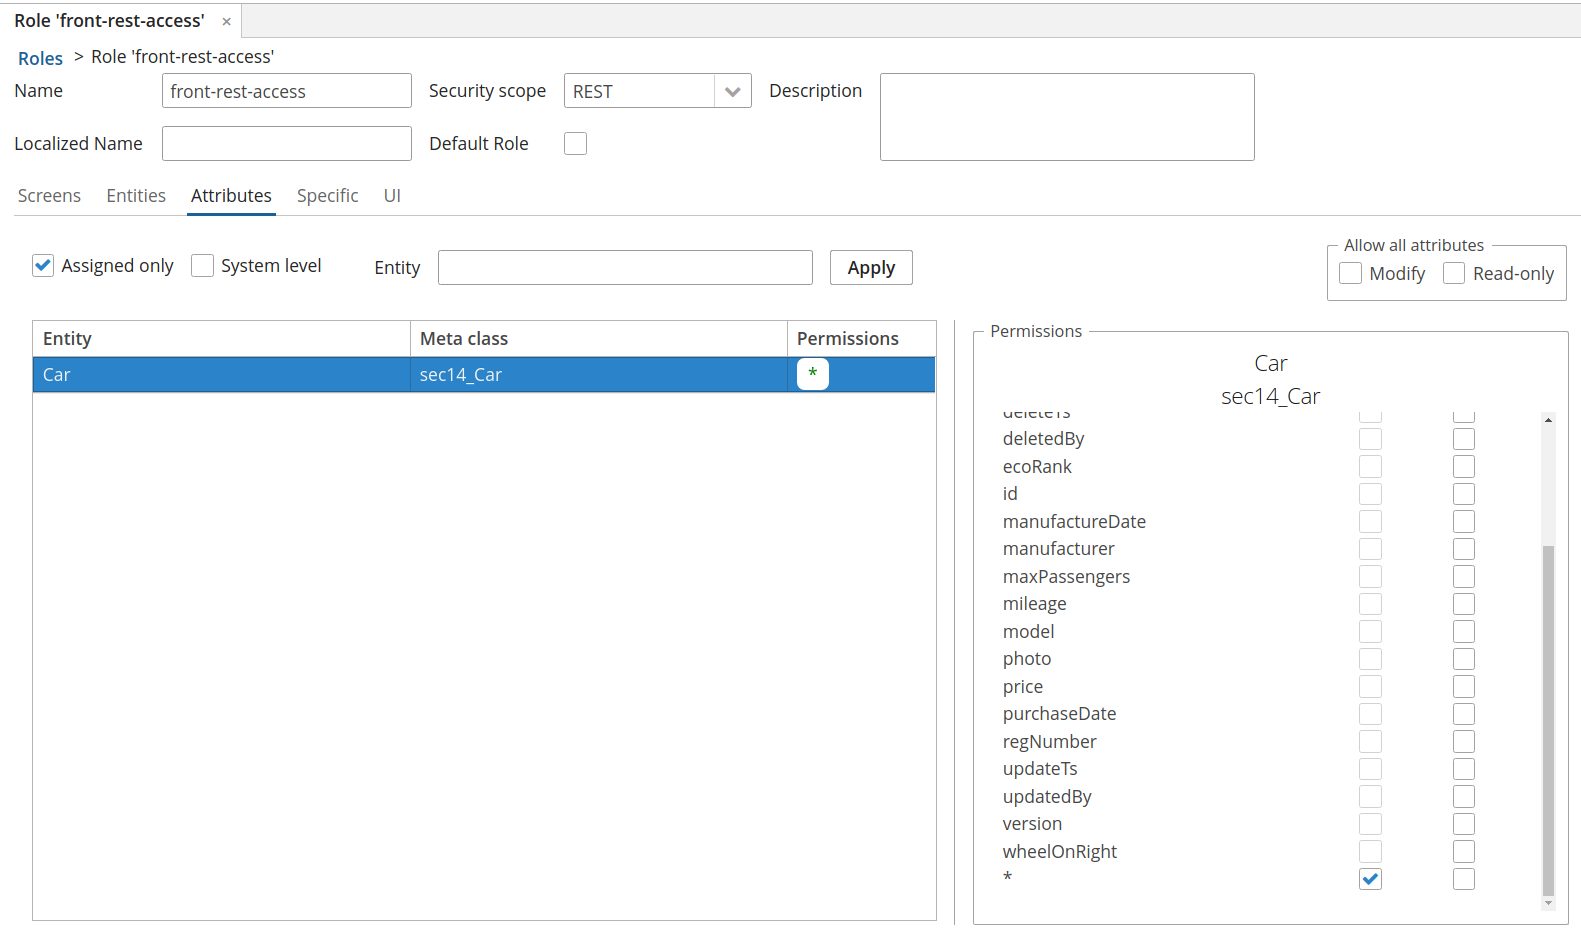
front-rest-accessrole edit screen, click on Attributes tab. -
select entity attributes, which should be accessible

| It’s strictly recommended to add only that attribute permissions, which are used on frontend screens. |
Design Time REST API Role
Alternatively, design time role configuration can be used.
Example of this approach can be found in sample backend app sample-car-rent which is used for front-generator testing. Classes are located in security folder.
@Role(name = RestMechanicsRole.NAME, securityScope = "REST")
public class RestMechanicsRole extends AnnotatedRoleDefinition {

    public static final String NAME = "rest-mechanics";

    @NotNull
    @Override
    @EntityAccess(entityClass = Car.class, operations = {EntityOp.CREATE, EntityOp.READ, EntityOp.UPDATE, EntityOp.DELETE})
    public EntityPermissionsContainer entityPermissions() {
        return super.entityPermissions();
    }

    @NotNull
    @Override
    @EntityAttributeAccess(entityClass = Car.class, modify = {"carType", "manufacturer", "mileage", "model"})
    public EntityAttributePermissionsContainer entityAttributePermissions() {
        return super.entityAttributePermissions();
    }

    @NotNull
    @Override
    @SpecificAccess(permissions = {"cuba.restApi.enabled", "cuba.restApi.fileUpload.enabled"})
    public SpecificPermissionsContainer specificPermissions() {
        return super.specificPermissions();
    }

}