4.2.4. HTML Template
An HTML template is defined in an .html file (UTF-8 encoding without BOM). You can use HTML/CSS features of Flying Saucer library; its main guide is available at http://flyingsaucerproject.github.io/flyingsaucer/r8/guide/users-guide-R8.html
To control page size, page headers and footers, use special CSS rules and properties. You can find an example of a report with repeatable header and footer blocks in the Sample Reports section.
There are two ways to place data in a template:
-
Using FreeMarker tags.
-
Using Groovy templating engine.
By default, the Report wizard generates an HTML template with FreeMarker tags.
Use the Template type radiobutton in the template editor to switch between the methods.
- Groovy templating engine
-
You can preprocess HTML report template as Groovy template. It will be processed by GStringTemplateEngine.
The template engine uses JSP style
<% %>script and<%= %>expression syntax orGStringstyle expressions. The variableoutis bound to the writer that the template is being written to. Thus, the template can use any code on Groovy if it is properly defined.GStringTemplateEnginehas access to:-
external parameters:
BandName.fields.ParamName; -
bands:
BandName.bands.ChildBandName; -
fields:
BandName.fields.FieldName.
You may use variables for convenience, e.g.:
<% def headerRow = Root.bands.HeaderRow %>
<p>Date: ${headerRow.fields.reportDate}</p>
Below is an example of a template which outputs a report for a single user.
<?xml version="1.0" encoding="utf-8"?>
<!DOCTYPE html PUBLIC "-//W3C//DTD XHTML 1.1//EN" "http://www.w3.org/TR/xhtml11/DTD/xhtml11.dtd">
<html xmlns="http://www.w3.org/1999/xhtml" xml:lang="ru">
    <head>
        <title> Report User </title>
        <style type="text/css">
 body {font-family: 'Charis SIL', sans-serif;} tbody tr {height:20px; min-height:20px}
        </style>
    </head>
    <body>
        <% def user = Root.bands.User %>
        <p>Login: ${user.fields.login.first()}</p>
        <p>Active: ${user.fields.active.first()}</p>
    </body>
</html>
You can find an example of a report with Groovy templating in the Sample Reports section.
-
- FreeMarker
-
FreeMarker documentation is available at https://freemarker.apache.org/docs/.
The FreeMarker document model has the following structure:
Band {
      bands [ bandName : [ band, .. ], .. ]
      fields [ fieldName : fieldValue, .. ]
}
For example, you should use the following expression to access the
namefield in a row having index 0 of thebandband:Root.bands.band[0].fields.nameYou may use variables for convenience, e.g.:
<#assign headerRow = Root.bands.Header[0]>
<p>Date: ${headerRow.fields.reportDate}</p>
You can also use such functions as
getMessage()andgetMainMessage()to get localized values:-
getMessage()helps you to get localized enum values or, in case you pass two string parameters(msgPack, key), searches for the value by the key in the given message pack:${getMessage(order.status)} -
getMainMessage(), in turn, takes one string parameterkeyand returns the value from the main message pack:${getMessage(outOfStockMessage)}
Below is an example of a template which outputs a report consisting of two bands,
BookandAuthors. The first band outputs a book name and genre, and the second outputs a list of authors of this book.<!doctype html> <html> <head></head> <body> <#assign book = Root.bands.Book[0] /> <#assign authors = Root.bands.Authors /> <p>Name: ${book.fields.name}</p> <p>Genre: ${book.fields.literatureType.name}</p> <table border="1" cellpadding="5" cellspacing="0" width="200"> <thead> <tr> <td>First name</td> <td>Last name</td> </tr> </thead> <tbody> <#list authors as author> <tr> <td>${author.fields.firstName}</td> <td>${author.fields.lastName}</td> </tr> </#list> </tbody> </table> </body> </html>Below is a more complex example. Let us assume we have the following bands structure:
Root { HeaderBand { query = return [[ "name" : "Column1" ],[ "name" : "Column2" ]] } Band1 { query = return [ ["field1" : "Value 11", "field2" : "Value 12"], ["field1" : "Value 21" , "field2" : "Value 22"] ] } Band2 { query = return [[ "header" : "Header1" ], [ "header" : "Header2" ]] SubBand1 { query = return [["header" : 'SubHeader1'] , [ "header" : 'SubHeader2' ]] } } }-
Inserting a field:
<!doctype html> <html> <head> <title> Simple template </title> </head> <body> <#assign Tree1 = Root.bands.Band2> <h1> Header </h1> <p> ${Tree1[1].bands.SubBand1[0].fields.header} </p> </body> </html>-
Inserting a list:
<!doctype html> <html> <head> <title> List </title> </head> <body> <#assign Table1Header = Root.bands.HeaderBand> <#if Table1Header?has_content> <ol> <#list Table1Header as header> <li> ${header.fields.name} </li> </#list> </ol> </#if> </body> </html>-
Inserting a table:
<!doctype html> <html> <head> <title> Table </title> </head> <body> <#assign Table1Header = Root.bands.HeaderBand> <#assign Table1 = Root.bands.Band1> <table border="1" cellpadding="5" cellspacing="0" width="200"> <thead> <tr> <#list Table1Header as header> <td> ${header.fields.name} </td> </#list> </tr> </thead> <tbody> <#list Table1 as row> <tr> <td> ${row.fields.field1} </td> <td> ${row.fields.field2} </td> </tr> </#list> </tbody> </table> </body> </html>-
Inserting a multi-level list:
<!doctype html> <html> <head> <title> Multi-level list </title> </head> <body> <#assign Tree1 = Root.bands.Band2> <ul> <#list Tree1 as item> <li> <h2> ${item.fields.header} </h2> <#if item.bands.SubBand1?has_content> <ul> <#list item.bands.SubBand1 as subitem> <li> <h3> ${subitem.fields.header} </h3> </li> </#list> </ul> </#if> </li> </#list> </ul> </body> </html> -
- Embedded pictures
-
At the moment, CUBA Reporting add-on does not provide means of inserting images into HTML-reports similarly to DOCX/XLSX reports. Images still can be embedded with the
imgtag and the link to the picture in thesrcattribute. You can add images to the HTML-report in one of the following ways.-
by URL
An image can be hosted on the Tomcat server or any external hosting up to the local file reference. For example, the image hosted in the
deploy\tomcat\webapps\ROOT\imagesfolder can be inserted like:
<img src="http://localhost:8080/images/SomeImage.jpg" height="68" width="199" border="0" align="right"/>
-
by Bitmap
An image is added as a byte array within the
srcattribute. This approach allows you to use variables for theFileDescriptorattributes of the entities. The byte array can even be added directly to the template, even though this approach is not recommended:
<img alt="SomePicture.png" src="data:image/png;base64,iVBORw0K ..... AcEP9PwxD0hNKK1FCAAAAAElFTkSuQmCC"/>
-
by custom prefixes:
-
You can use the
core://andweb://prefixes to reference to image resources from the web or core module without having to hard-code webPort and webContextName in the template. For example, the image hosted in thedeploy\tomcat\webapps\app\VAADIN\imagesfolder can be inserted like:<img src="web://VAADIN/images/SomeImage.jpg" height="68" width="199" border="0" align="right"/> -
fs://prefix allows inserting an image by specifyingFileDescriptorID. For example:<img src="fs://fede432a-4f5d-3bab-71a0-b98133759b0f" height="68" width="199" border="0" align="right"/>
-
-
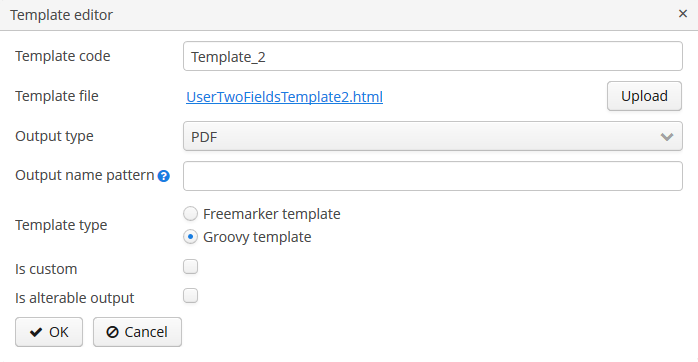
- Inline editor
-
HTML templates support inline editing. You can edit the template directly in the Template editor window and see the changes without having to re-upload the template file.
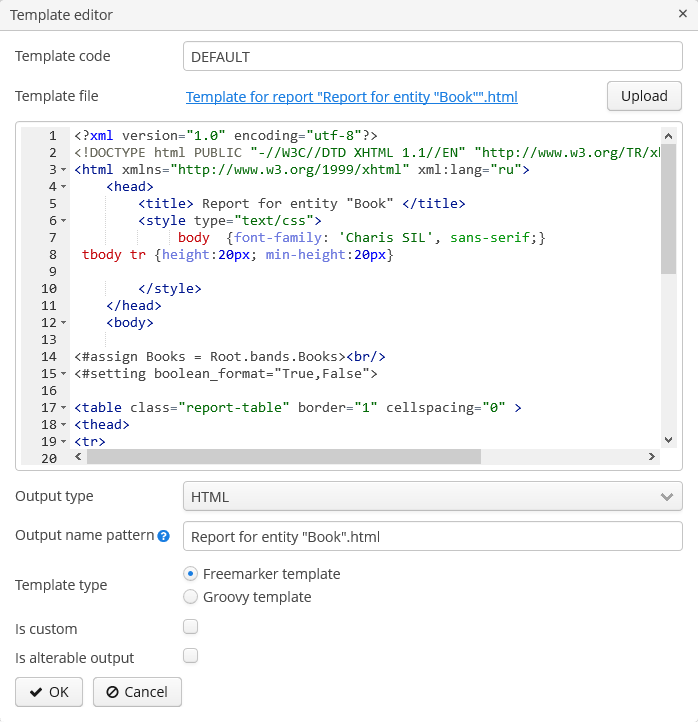 Figure 41. HTML Inline Editor