5.3.10.1. WAR Deployment to Heroku
- Heroku account
-
First, create an account on Heroku using the web browser, free account
hobby-devis enough. Then login to the account and create new application using New button at the top of the page.Select unique name (or left the field blank to assign automatically) and choose a server location. Now you have an application, for example,
morning-beach-4895, this is the Heroku application name.At the first time, you will be redirected to the Deploy tab. Use Heroku Git deployment method.
- Heroku CLI
-
-
Install Heroku CLI on your computer.
-
Navigate to the folder containing your CUBA project. Further on we will use
$PROJECT_FOLDERfor it. -
Open command prompt in
$PROJECT_FOLDERand type:heroku login -
Enter your credentials when prompted. From now on you don’t need to enter credentials for this project anymore.
-
Install Heroku CLI deployment plugin:
heroku plugins:install heroku-cli-deploy
-
- PostgreSQL database
-
Using the web browser go to Heroku data page
You can choose existent Postgres database or create one. Next steps describe how to create a new database.
-
Find Heroku Postgres block and click Create one
-
On the next screen click Install Heroku Postgr…
-
Connect the database to Heroku application selected from a dropdown list
-
Select your Plan (for example:
hobby-dev)
Alternatively, you can install PostgreSQL using Heroku CLI:
heroku addons:create heroku-postgresql:hobby-dev --app morning-beach-4895Here
morning-beach-4895is your Heroku application name.Now you can find the new database on the Resources tab. The database is connected to the Heroku application. To obtain database credentials go to the Datasource page of your Heroku database, scroll down to Administration section and click View credentials button.
Host compute.amazonaws.com Database d2tk User nmmd Port 5432 Password 9c05 URI postgres://nmmd:9c05@compute.amazonaws.com:5432/d2tk -
- Project deployment settings
-
-
We assume that you use PostgreSQL with your CUBA project.
-
Open your CUBA project in Studio, navigate to CUBA Project Tree → Deployment, open WAR Settings dialog and then configure options as described below.
-
Select Build WAR
-
Set application home directory to '.' (dot)
-
Select Include JDBC driver
-
Select Include Tomcat’s context.xml
-
Click Generate button next to the Custom context.xml path field. Fill your database connection details in modal window.
-
Open the file generated
modules/core/web/META-INF/war-context.xmland check connection params and credentials:<Context> <!-- Database connection --> <Resource name="jdbc/CubaDS" type="javax.sql.DataSource" maxTotal="20" maxIdle="2" maxWaitMillis="5000" driverClassName="org.postgresql.Driver" url="jdbc:postgresql://compute.amazonaws.com/d2tk" username="nmmd" password="9c05"/> <!-- ... --> </Context> -
Select Single WAR for Middleware and Web Client
-
Click Generate button next to the Custom web.xml path field
-
Copy the code shown below and paste it into the App properties field:
[ 'cuba.automaticDatabaseUpdate' : true ] -
Save deployment settings and wait until Gradle project is refreshed.
-
-
- Build WAR file
-
Build WAR file by double-clicking the new Build WAR project tree item or by executing the
buildWarGradle task:gradlew buildWar - Application setup
-
-
Download Tomcat Webapp Runner from https://mvnrepository.com/artifact/com.github.jsimone/webapp-runner. The version of Webapp Runner must conform to the Tomcat version in use. For example, version 8.5.11.3 of Webapp Runner is suitable for Tomcat version 8.5.11. Rename JAR to
webapp-runner.jarand place it into$PROJECT_FOLDER. -
Download Tomcat DBCP from https://mvnrepository.com/artifact/org.apache.tomcat/tomcat-dbcp. Use the version corresponding to your Tomcat version, for example, 8.5.11. Create
$PROJECT_FOLDER/libs, rename JAR totomcat-dbcp.jarand place it into the$PROJECT_FOLDER/libsfolder. -
Create a file named
Procfilein$PROJECT_FOLDER. The file should contain the following text:web: java $JAVA_OPTS -cp webapp-runner.jar:libs/* webapp.runner.launch.Main --enable-naming --port $PORT build/distributions/war/app.war
-
- Git setup
-
Open the command prompt in
$PROJECT_FOLDERand run the commands listed below:git init heroku git:remote -a morning-beach-4895 git add . git commit -am "Initial commit" - Application deployment
-
Open the command prompt and run the following command:
On *nix:
heroku jar:deploy webapp-runner.jar --includes libs/tomcat-dbcp.jar:build/distributions/war/app.war --app morning-beach-4895On Windows:
heroku jar:deploy webapp-runner.jar --includes libs\tomcat-dbcp.jar;build\distributions\war\app.war --app morning-beach-4895Open the Resources tab in Heroku dashboard. A new Dyno should appear with a command from your
Procfile: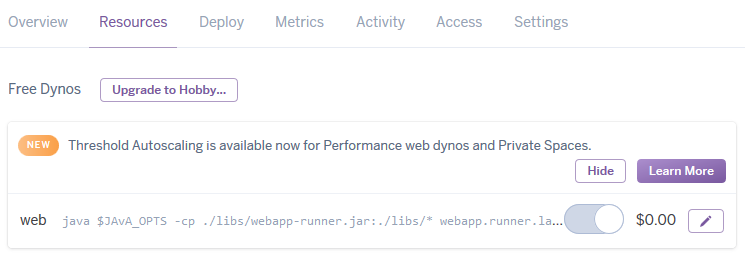
The application is deploying now. You can monitor logs to track the process.
- Logs monitoring
-
Wait for a message
https://morning-beach-4895.herokuapp.com/ deployed to Herokuin command window.In order to track application logs, run the following command on the command line:
heroku logs --tail --app morning-beach-4895
After the deployment process is completed your application will be accessible in web browser by an URL like https://morning-beach-4895.herokuapp.com.
You can also open the application from the Heroku dashboard using the Open app button.