2.5.4. Customer Editor With a List of Orders
Do the following to display the list of orders in the Customer edit screen:
Go to the Generic UI section of CUBA project tree. Open the customer-edit.xml screen for editing.
Switch to the Designer tab.
In the components palette find Collection in the Data components group. Drag this component to the data section in screen components hierarchy panel.
Select the com.company.sales.entity.Order entity and its _local view for the data container. Generate the loader ID using the  button.
Add the WHERE clause to the generated query to select only the orders that have a reference to the edited customer:
select e from sales_Order e where e.customer = :customerFinally, you should see a data container which will load the Order instances in customer-edit screen XML descriptor:
<data>
    <instance id="customerDc" class="com.company.sales.entity.Customer" view="_local">
        <loader/>
    </instance>
    <collection id="ordersDc" class="com.company.sales.entity.Order" view="_local">
        <loader id="ordersDl">
            <query><![CDATA[select e from sales_Order e where e.customer = :customer]]></query>
        </loader>
    </collection>
</data>
Then, drag Label from the components palette to components hierarchy panel and place it between form and editActions. Go to the Properties tab on the properties panel. Enter Orders in the value field.
|
If the application is intended to be used in multiple languages, use the |
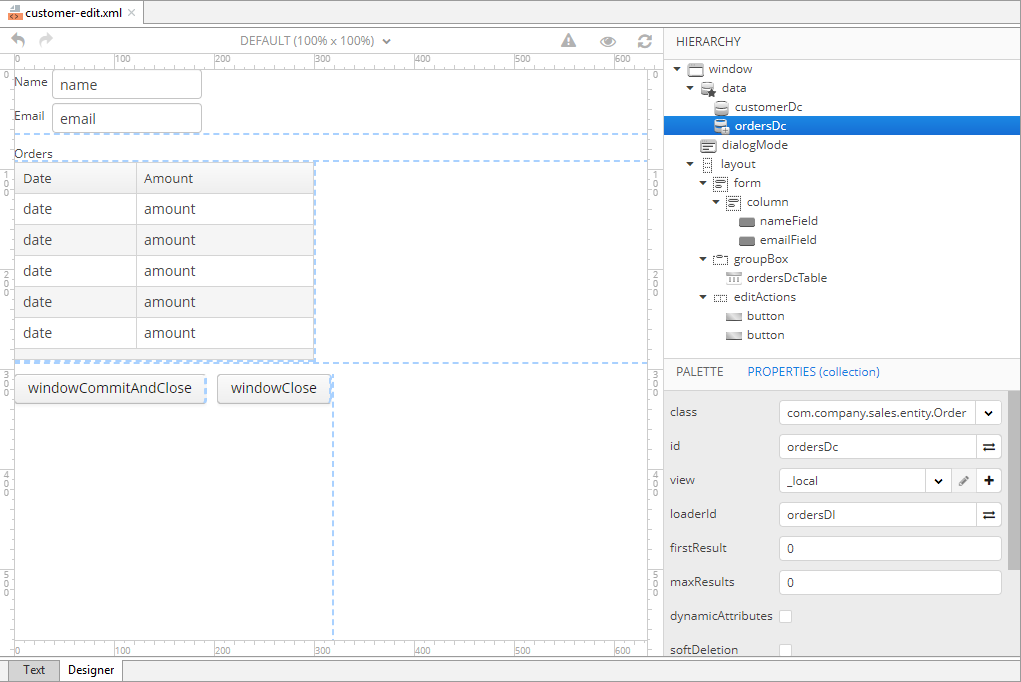
Drag Table from the components palette to components hierarchy panel and place it between label and editActions. Select this component in the hierarchy and specify table size in the Properties tab: set 300px in the width field and 200px in the height field. Choose ordersDc from the list of available data containers. Then generate the table identifier using the  button next to the id field:
 ordersTable.
Next, right-click on the table and select Wrap Into > Group Box from the context menu. Go to the Properties tab on the properties panel of this group box and enter Orders in the caption field and set group box width to 320 px.

As a result, the customer-edit.xml code on the Text tab will look as follows:
<?xml version="1.0" encoding="UTF-8" standalone="no"?>
<window xmlns="http://schemas.haulmont.com/cuba/screen/window.xsd" caption="msg://editorCaption" focusComponent="form"
        messagesPack="com.company.sales.web.customer">
    <data>
        <instance id="customerDc" class="com.company.sales.entity.Customer" view="_local">
            <loader/>
        </instance>
        <collection id="ordersDc" class="com.company.sales.entity.Order" view="_local">
            <loader id="ordersDl">
                <query><![CDATA[select e from sales_Order e where e.customer = :customer]]></query>
            </loader>
        </collection>
    </data>
    <dialogMode height="600" width="800"/>
    <layout expand="editActions" spacing="true">
        <form id="form" dataContainer="customerDc">
            <column width="250px">
                <textField id="nameField" property="name"/>
                <textField id="emailField" property="email"/>
            </column>
        </form>
        <groupBox caption="Orders">
            <table id="ordersDcTable" dataContainer="ordersDc" height="200px" width="300px">
                <columns>
                    <column id="date"/>
                    <column id="amount"/>
                </columns>
            </table>
        </groupBox>
        <hbox id="editActions" spacing="true">
            <button action="windowCommitAndClose"/>
            <button action="windowClose"/>
        </hbox>
    </layout>
</window>
Open the CustomerEdit screen controller. The  and
and  buttons on the gutter enable quick switching between the screen descriptor and controller.
First - we need to disable automatic data load for the screen, because we need custom data load process. To disable automatic data load, remove @LoadDataBeforeShow annotation from the class.
Inject the orders loader in the controller class by pressing Alt+Insert inside the class definition and selecting ordersDl from the list. Or you can just type the following code manually:
@Inject
private CollectionLoader<Order> ordersDl;
Then, subscribe to the BeforeShowEvent to set the customer parameter value for the ordersDl data loader. To do this, click Alt+Insert znd select Subscribe to Event > BeforeShowEvent in the Generate menu. And, of course, you can just add the following code manually.
@UiController("sales_Customer.edit")
@UiDescriptor("customer-edit.xml")
@EditedEntityContainer("customerDc")
public class CustomerEdit extends StandardEditor<Customer> {
    @Inject
    private CollectionLoader<Order> ordersDl;

    @Subscribe
    protected void onBeforeShow(BeforeShowEvent event) {
        ordersDl.setParameter("customer", getEditedEntity());
        getScreenData().loadAll();
    }
}
This method will be in charge of loading related Order instances.
