2.2. Creating a Project
-
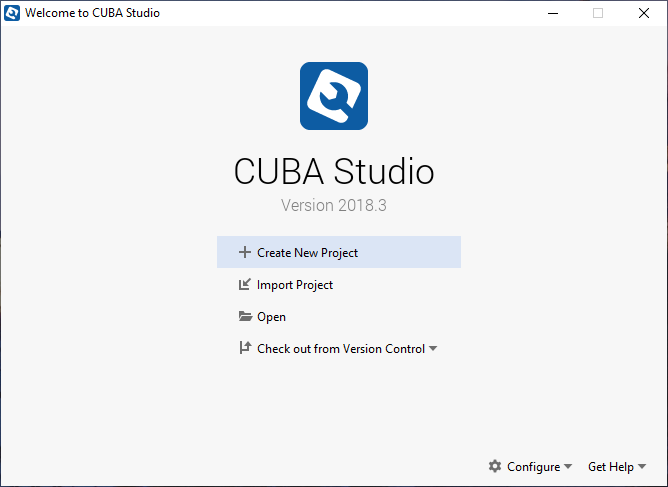
Start CUBA Studio.
-
Click Create New Project.
-
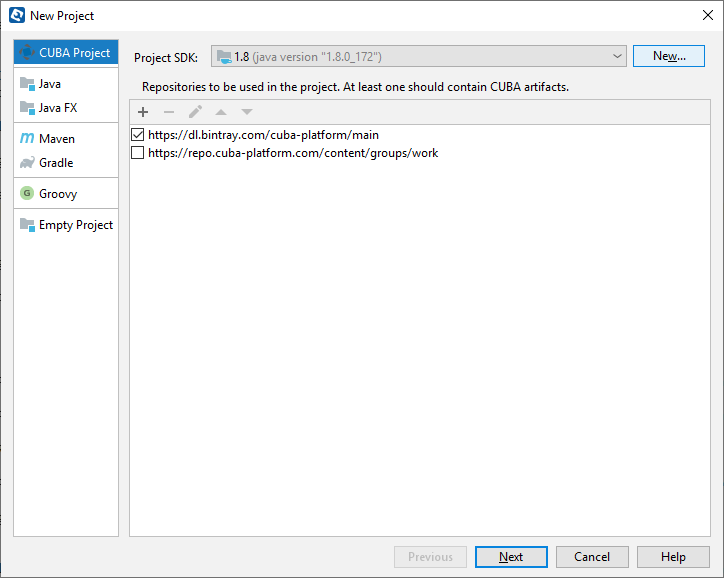
Make sure that Java SE Development Kit (JDK) 8 is installed and selected as the project JDK by default.
The list of repositories already contains binary artifacts repository URL and authentication parameters.
-
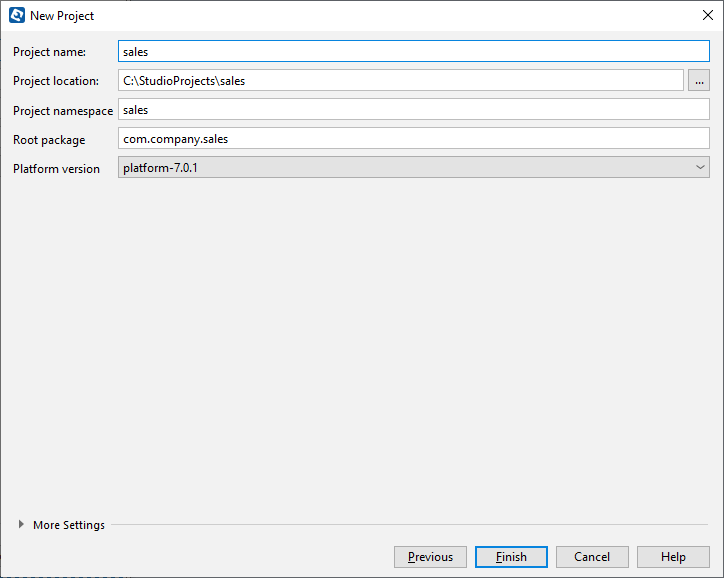
Specify the name of the new project in the Project name field of the New project window – for example,
sales. The name should contain only Latin letters, numbers and underscores. Think carefully on the project name at this stage, as changing it later on will require complex manual intervention.The following fields below will be automatically populated:
-
Project location – the path to the new project directory. You can select the directory manually by clicking the … button next to the field. The Select folder window will appear with the list of folders on your hard drive. You can select one of those, or create a new directory.
-
Project namespace – the namespace which will be used as a prefix for entity names and database tables. The namespace can consist of Latin letters only and should be as short as possible. For example, if the project name is
sales_2, the namespace can besalesorsal. -
Root package − the root package of Java classes. It can be adjusted later, but the classes generated at project creation will not be moved.
-
Platform version – the platform version used in the project. The platform artifacts will be automatically downloaded from the repository on project build.
-
-
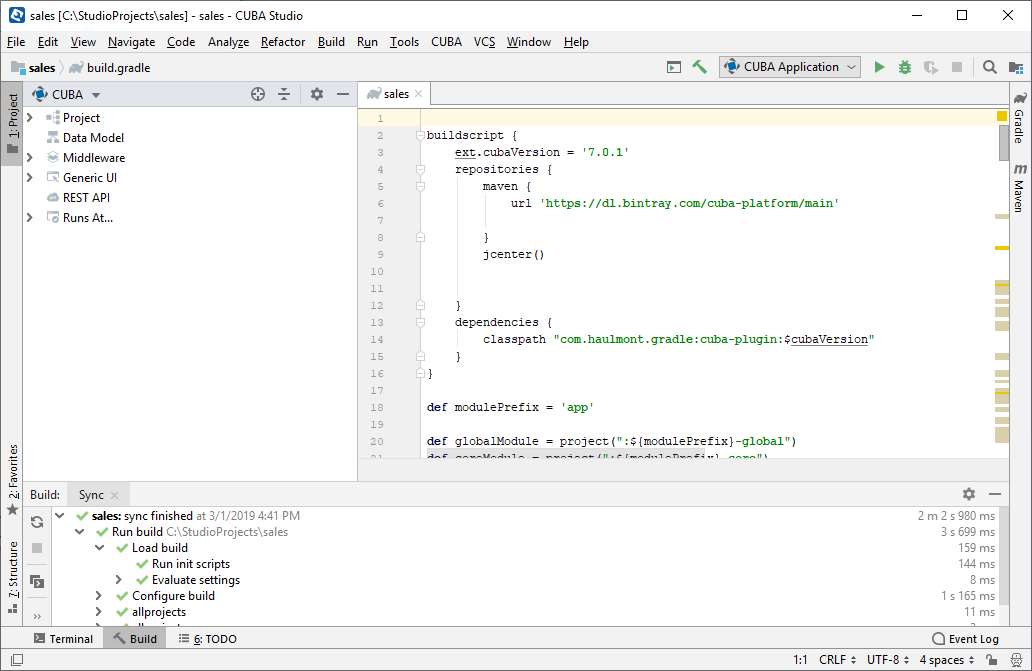
Click Finish. The empty project will be created in the specified
salesdirectory, and the main Studio workspace will open.If it is your first use of Studio, it will start with downloading and connecting to Gradle daemon. Also, during the first use of the particular platform build, Studio will download the sources and binary artifacts of the platform. In this case opening the project and assembling the application may take some time. Before starting to work on the project, wait until the synchronization and indexation finish.
-
Create the database on the local HSQL database server: select option CUBA > Create database in the main menu. The database name is the same as project namespace by default.
-
Select CUBA > Start application server option. Also, you can use Run Configuration dropdown on the toolbar to run the application. The link in the Runs at… section of the CUBA project tree will help to open the application in a web browser directly from Studio.
The username and password are
admin/admin.The running application contains two main menu items (Administration and Help), as well as security and administration subsystems functionality.