3.5.20. Anonymous Access to Screens
By default, only the login screen is available to the anonymous (not authenticated) session. By extending the login screen, you can add any information on it, or even add the WorkArea component and be able to open inside of it other screens available to the anonymous user. But as soon as the user logs in, all screens opened in the anonymous mode will be closed.
You may want to have some application screens to be always accessible regardless of whether the user is authenticated or not. Consider the following requirements:
-
When users open the application, they see a Welcome screen.
-
There is an Info screen with some publicly available information. The Info screen must be shown in a top level window, i.e. without main menu and other standard main window controls.
-
Users can open the Info screen both from the Welcome screen and by entering an URL in web browser.
-
Also from the Welcome screen, the user can go to login screen and continue working with the rest of the system as authenticated user.
Implementation steps are described below.
-
Create the Info screen and annotate its controller with
@Routeto be able to open it using a link:<?xml version="1.0" encoding="UTF-8" standalone="no"?> <window xmlns="http://schemas.haulmont.com/cuba/screen/window.xsd" caption="msg://caption" messagesPack="com.company.demo.web.info"> <layout margin="true"> <label value="Info" stylename="h1"/> </layout> </window>package com.company.demo.web.info; import com.haulmont.cuba.gui.Route; import com.haulmont.cuba.gui.screen.*; @UiController("demo_InfoScreen") @UiDescriptor("info-screen.xml") @Route(path = "info") (1) public class InfoScreen extends Screen { }1 - specifies the screen’s address. When the screen is opened in the top-level window (as root), its address will be like http://localhost:8080/app/#info. -
Extend the default main screen in the project to implement the required Welcome screen. Use one of the Main screen … templates in the screen creation wizard in Studio, then add some components to the
initialLayoutelement, for example:<?xml version="1.0" encoding="UTF-8" standalone="no"?> <window xmlns="http://schemas.haulmont.com/cuba/screen/window.xsd" xmlns:ext="http://schemas.haulmont.com/cuba/window-ext.xsd" extends="/com/haulmont/cuba/web/app/main/main-screen.xml"> <layout> <hbox id="horizontalWrap"> <workArea id="workArea"> <initialLayout> <label id="welcomeLab" stylename="h1" value="Welcome!"/> <button id="openInfoBtn" caption="Go to Info screen"/> </initialLayout> </workArea> </hbox> </layout> </window>package com.company.demo.web.main; import com.company.demo.web.info.InfoScreen; import com.haulmont.cuba.gui.Screens; import com.haulmont.cuba.gui.components.Button; import com.haulmont.cuba.gui.screen.*; import com.haulmont.cuba.web.app.main.MainScreen; import javax.inject.Inject; @UiController("main") @UiDescriptor("ext-main-screen.xml") public class ExtMainScreen extends MainScreen { @Inject private Screens screens; @Subscribe("openInfoBtn") private void onOpenInfoBtnClick(Button.ClickEvent event) { screens.create(InfoScreen.class, OpenMode.ROOT).show(); (1) } }1 - create InfoScreenand open it in the root window when the user clicks the button. -
In order to open our Welcome screen instead of login screen when the user enters the application, add the following properties to the
web-app.propertiesfile:cuba.web.initialScreenId = main cuba.web.allowAnonymousAccess = true -
Enable Info screen for anonymous users: start the application, go to Administration > Roles, create the Anonymous role in the role editor screen, and enable access to the Info screen for the Anonymous role. Assign the newly created role to the anonymous user.
As a result, when users open the application, they see the Welcome screen:
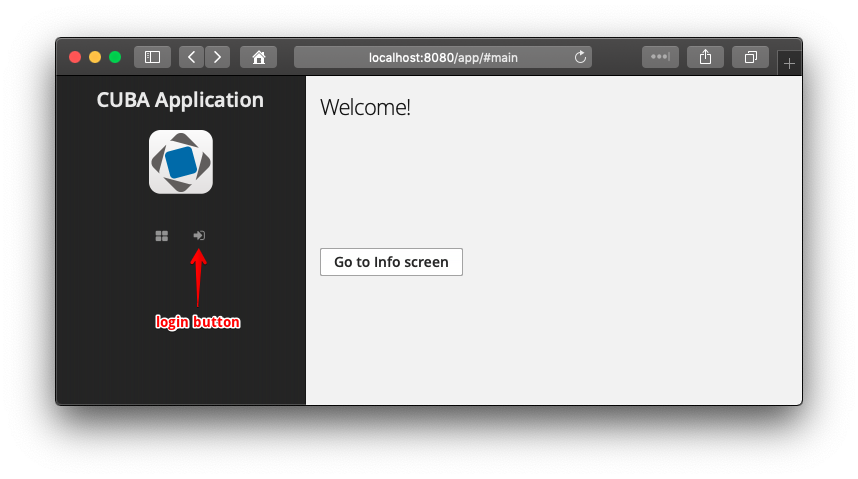
Users can open Info screen without authentication or click the login button to enter the secured part of the application.