3.9.1.1. Managing Dynamic Attributes
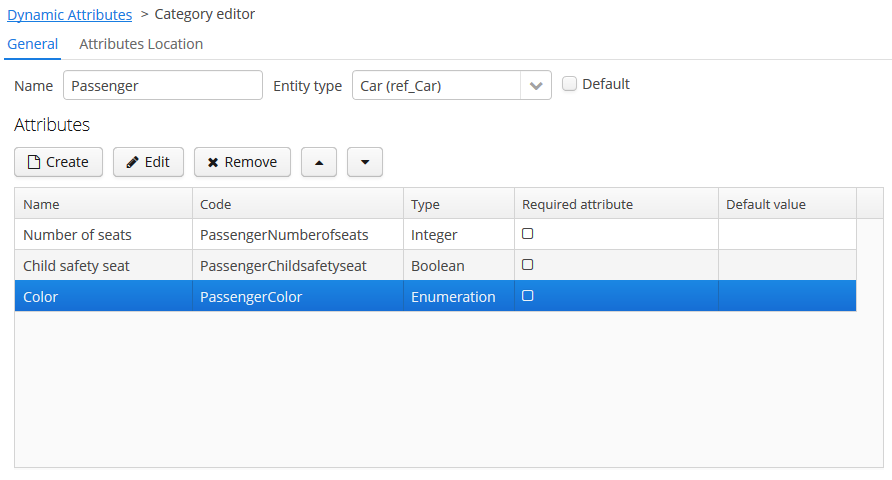
You can manage dynamic attributes in the Administration > Dynamic Attributes screen. The screen has a list of categories on the left and attributes belonging to the selected category on the right.
In order to create a dynamic attribute for an entity, first create a category for it. The Default checkbox in the category editor indicates that this category will be automatically selected for a new instance if the entity implements the Categorized interface. If the entity does not implement Categorized, the checkbox value is not used and you can create either a single category for the entity, or multiple categories - all their attributes will be displayed according to the visibility settings.
After making changes in the dynamic attributes configuration, click Apply settings button in the categories browser. Changes can also be applied via Administration > JMX Console by calling the clearDynamicAttributesCache() method of the app-core.cuba:type=CachingFacade JMX bean.
Below is an example of the category editor screen:
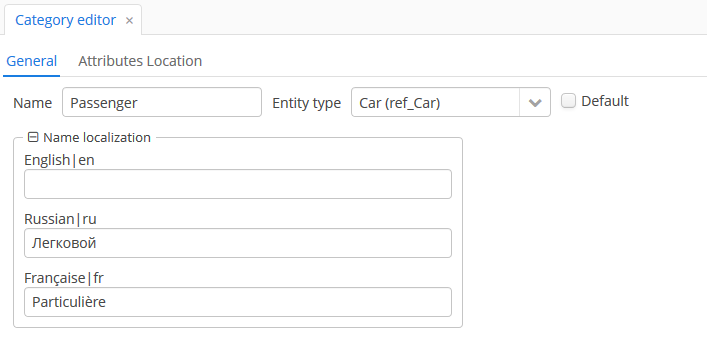
The Name localization groupbox is shown on the category editor screen if the application supports more than one language. It enables setting the localized values of category names for each available locale.
On the Attributes Location tab, you can set the location of each dynamic attribute inside the DynamicAttributesPanel.
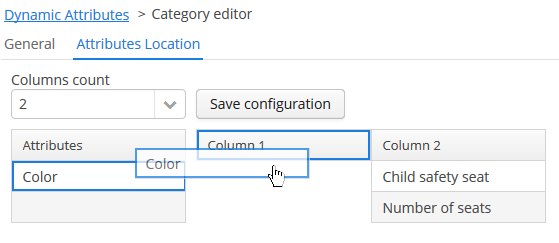
Specify the number of columns in the Columns count drop-down list. To change the position of an attribute, drag it from the attribute list to the desired column and the desired line. You can add empty cells or change the order of the attributes. After making the changes, click on the Save configuration button.
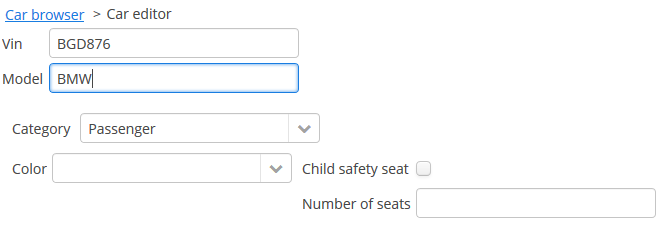
Location of the attributes in the DynamicAttributesPanel of the entity editor:
Dynamic attribute editor enables setting the name, system code, description, value type, the default value of the attribute and the validation script.
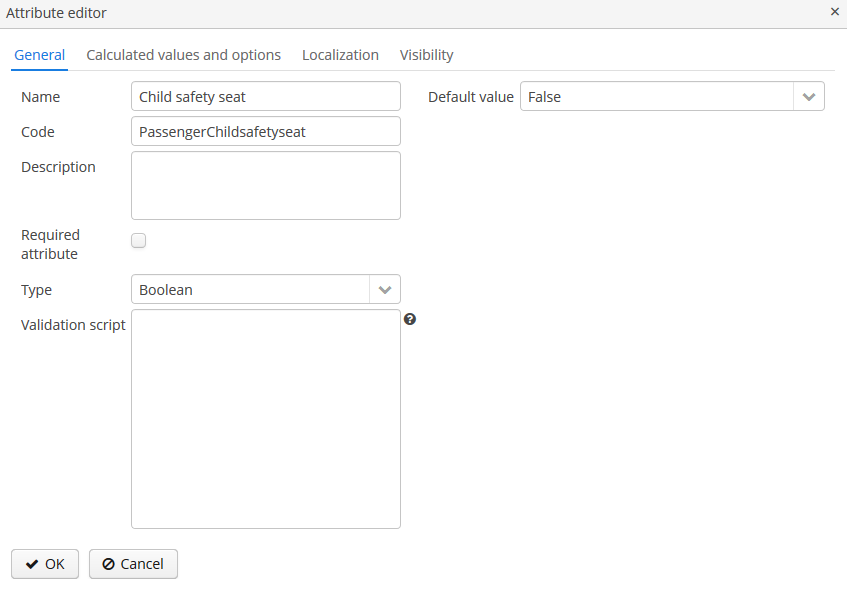
For all value types, except Boolean, there is a Width field available to set up the field width in Form in pixels or as a percentage. If the Width field is empty, its assumed value is 100%.
For all value types, except Boolean, there is also an Is collection checkbox available. It allows you to create multi-valued dynamic attributes of a selected type.
For all numeric value types: Double, Fixed-point number, Integer – the following fields are available:
-
Minimum value – when you enter an attribute value, it checks that the value must be greater than or equal to the specified minimum value.
-
Maximum value – when you enter an attribute value, it checks that the value must be less than or equal to the specified maximum value.
For the Fixed-point number value type, the Number format pattern field is available in which you can specify a format pattern. The pattern is set according to the rules described in DecimalFormat.
For all value types, you can specify a script in the Validation script field to validate the value entered by the user. The validation logic is set in the Groovy script. If Groovy validation fails, the script should return an error message. Otherwise, the script should return nothing or may return null. The checked value is available in the script in the value variable. The error message uses a Groovy string; the $value key can be used in the message to generate the result.
For example:
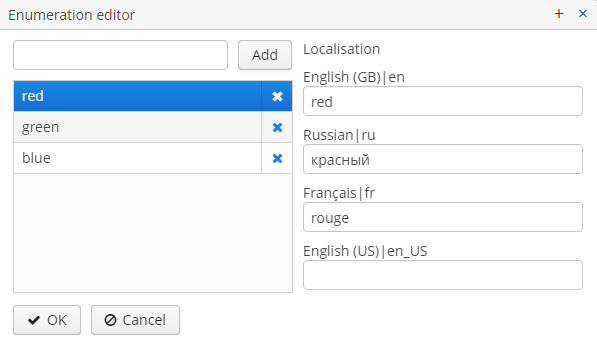
if (!value.startsWith("correctValue")) return "the value '\$value' is incorrect"For the Enumeration value type, the set of named values is defined in the Enumeration field via the list editor.
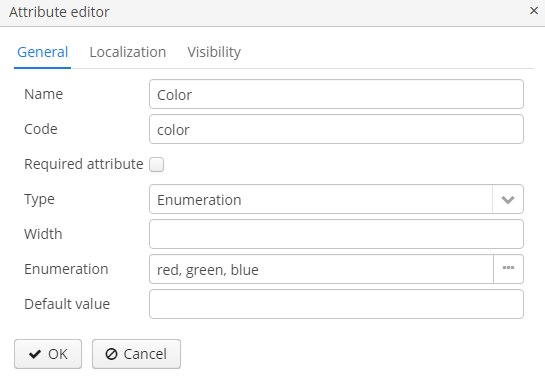
Each enumeration value can be localized to the languages, available for the application.
For String, Double, Entity, Fixed-point number and Integer data types the checkbox Lookup field is available. If this checkbox is set, the user can select the attribute value from the drop-down list. The list of valid values can be configured on the Calculated values and options tab. For the Entity data type Where and Join clauses are configured.
Consider the Calculated values and options tab. In the Attribute depends on field, you can specify which attributes the current attribute depends on. When changing the value of one of these attributes, either the script for calculating the attribute value or the script for calculating the list of possible values will be recalculated.
The Groovy script for calculating the attribute value is specified in the Recalculation value script field. The script must return a new parameter value. The following variables are passed to the script:
-
entity– the edited entity; -
dynamicAttributes– a map where thekey– the attribute code,value– the value of the dynamic attribute.
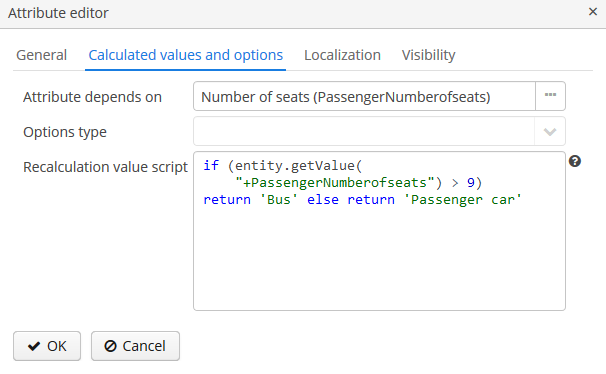
Example of a recalculation script using the dynamicAttributes map:
if (dynamicAttributes['PassengerNumberofseats'] > 9) return 'Bus' else return 'Passenger car'The script will be evaluated each time the value of one of the attributes which the attribute depends on is changed.
If the script is defined, the attribute input field will be non-editable.
Recalculation works only with the following UI components: Form, DynamicAttributesPanel.
The Options type field determines the type of the options loader and is required if the Lookup field checkbox has been set on the General tab. If the checkbox is not set, the Options type field is unavailable.
Available option loader types: Groovy, SQL, JPQL (only for Entity data type).
-
The Groovy options loader loads a list of values using the Groovy script. The
entityvariable is passed to the script where you can access the attributes of the entity (including dynamic attributes). An example script for an attribute of typeString: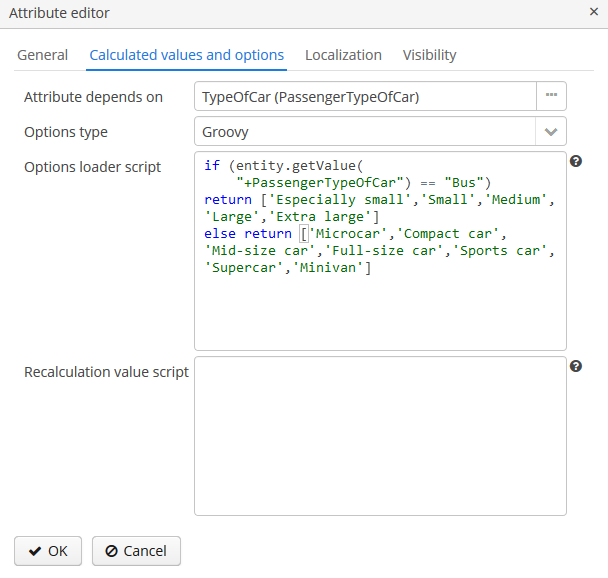 Figure 40. The script for the Groovy options loader
 -
The SQL options loader loads a list of values using a SQL script. You can access the entity id using the
${entity}variable. To access entity parameters, use the${entity.<field>}construction, wherefieldis the name of the entity parameter. The+prefix is used to access the dynamic attributes of an entity, such as${entity.+<field>}. Script sample (here we access to the entity and dynamic attributeCategorytype):select name from DYNAMICATTRIBUTESLOADER_TAG where CUSTOMER_ID = ${entity} and NAME = ${entity.+Categorytype} -
The JPQL option loader applies only to a dynamic attribute of the
Entitytype. JPQL conditions are specified in the JoinClause and Where Clause fields. Also, you can use the Constraint Wizard, which enables the visual creation of the JPQL conditions. You can use{entity}and{entity.<field>}variables in JPQL parameters.
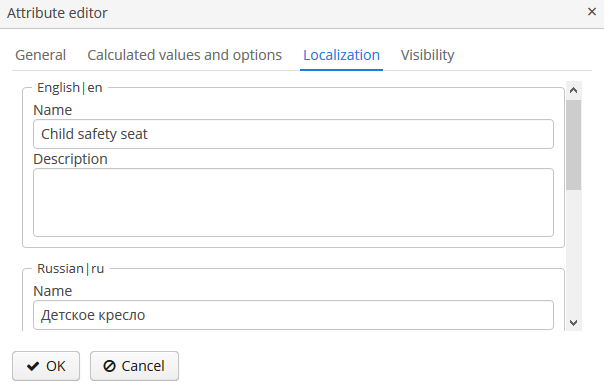
Localization is supported for all types of dynamic attributes:
- Visibility of attributes
-
A dynamic attribute also has visibility settings which define the screens where it should be displayed. By default, the attribute is not shown.
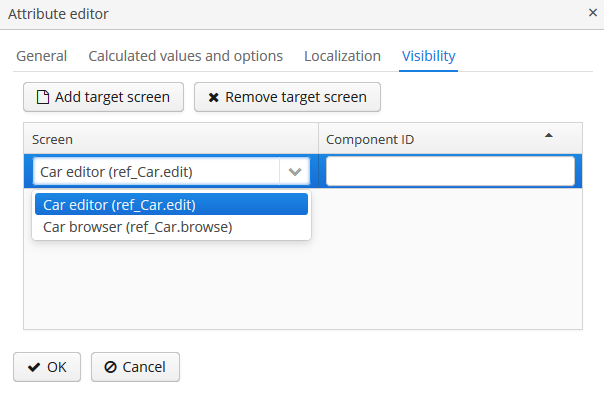 Figure 42. Dynamic Attribute Visibility Settings
In addition to the screen, you can also specify a component in which the attribute should appear (for example, for screens where several Form components show the fields of the same entity).
If the attribute is marked as visible on a screen, it will automatically appear in all forms and tables displaying entities of the corresponding type on the screen.
Access to dynamic attributes can also be restricted by user role settings. Security settings for dynamic attributes are similar to those for regular attributes.
Dynamic attributes can be added to a screen manually. In order to do this, add
dynamicAttributes="true"attribute to the data loader and use attribute’s code with+prefix when binding UI components to it:<data> <instance id="carDc" class="com.company.app.entity.Car" view="_local"> <loader id="carDl" dynamicAttributes="true"/> </instance> </data> <layout> <form id="form" dataContainer="carDc"> <!--...--> <textField property="+PassengerNumberofseats"/> </form>