5.3.9. Deployment to Bluemix Cloud
CUBA Studio provides support of IBM® Bluemix® cloud deployment in a few easy steps.
|
Bluemix cloud deployment is currently applicable only to projects using PostgreSQL database. HSQLDB is available with in-process option only, that means the database will be recreated on every application restart, and the user data will be lost. |
-
Create an account on the Bluemix. Download and install:
-
Bluemix CLI: http://clis.ng.bluemix.net/ui/home.html
-
Cloud Foundry CLI: https://github.com/cloudfoundry/cli/releases
-
Make sure the commands
bluemixandcfwork in the command line. If not, add your\IBM\Bluemix\binpath to thePATHenvironment variable.
-
-
Create a Space in the Bluemix with any space name. You can group several applications within one space if needed.
-
In the Space create an application server: Create App → CloudFoundry Apps → Tomcat.
-
Specify the name of the application. The name should be unique as it will be used as part of the URL of your application.
-
To create a Database service, click Create service in the Space dashboard and choose ElephantSQL.
-
Open the application manager and connect the created DB Service to the application. Click Connect Existing. For the changes to take effect, the system requires restaging (updating) the application. In our case, it is not necessary, as the application will be redeployed.
-
After the DB Service is connected, DB credentials become available with the View Credentials button. The DB properties are also stored in the
VCAP_SERVICESenvironment variable of the application runtime and could be viewed by calling thecf envcommand. The created database is also accessible from outside of the Space, so you can work with it from your development environment. -
Setup your CUBA project to run with the PostgreSQL (the DBMS similar to the one you have in the Bluemix).
-
Generate DB scripts and start the local Tomcat server. Make sure the application works.
-
Generate WAR-file to deploy the application to Tomcat.
-
Click Deployment > WAR Settings in the Project section of CUBA project view.
-
Enable all the options using checkboxes, as for correct deployment it should be the Single WAR with JDBC driver and
context.xmlinside.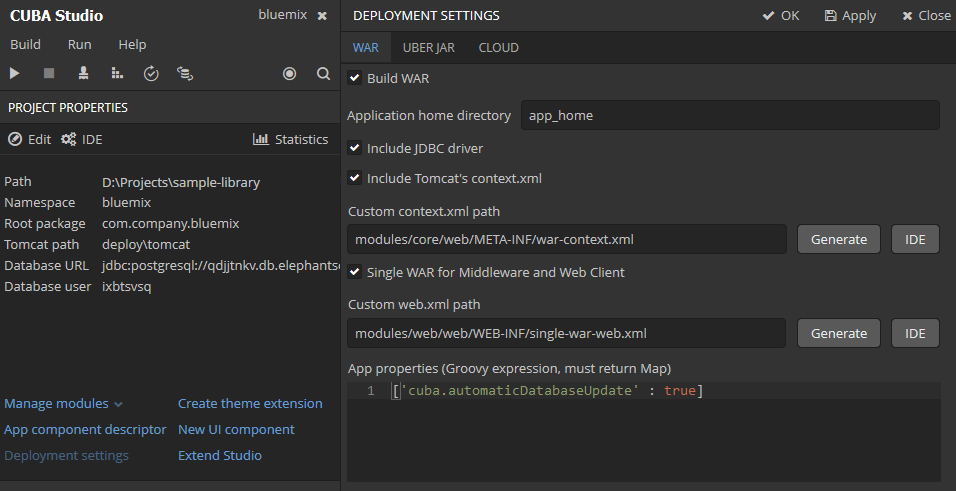
-
Click Generate button near the Custom context.XML field. In the opened dialog fill the credentials of the Database you have created in Bluemix.
Use the credentials from
uriof your DB service following the example below:{ "elephantsql": [ { "credentials": { "uri": "postgres://ixbtsvsq:F_KyeQjpEdpQfd4n0KpEFCYyzKAbN1W9@qdjjtnkv.db.elephantsql.com:5432/ixbtsvsq", "max_conns": "5" } } ] }Database user:
ixbtsvsqDatabase password:
F_KyeQjpEdpQfd4n0KpEFCYyzKAbN1W9Database URL:
qdjjtnkv.db.elephantsql.com:5432Database name:
ixbtsvsq -
Click Generate button to generate the custom
web.xmlfile required for the single WAR. -
Save the settings. Generate the WAR-file using the
buildWarGradle task in Studio or command line.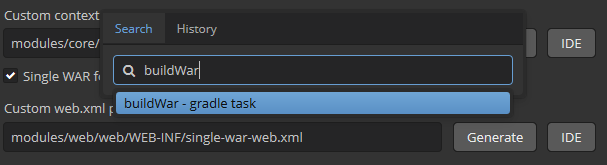
As a result, the
app.warappears in thebuild/distributions/war/sub-directory of the project.
-
-
In the root directory of the project create manually the
manifest.ymlfile. The contents of the file should be as follows:applications: - path: build/distributions/war/app.war memory: 1G instances: 1 domain: eu-gb.mybluemix.net name: myluckycuba host: myluckycuba disk_quota: 1024M buildpack: java_buildpack env: JBP_CONFIG_TOMCAT: '{tomcat: { version: 8.0.+ }}' JBP_CONFIG_OPEN_JDK_JRE: '{jre: { version: 1.8.0_+ }}'where
-
pathis the relative path to WAR-file. -
memory: the default memory limit is 1G. You may want to allocate less or more memory to your application, this can also be done via Bluemix WEB interface. Note that the allocated memory affects the Runtime Cost. -
nameis the name of the Tomcat application you have created in the Cloud above (depends on your application location, see yourApp URL, for example,https://myluckycuba.eu-gb.mybluemix.net/). -
host: the same as name. -
env: the environment variables used to set the Tomcat and Java versions.
-
-
In the command line switch to the root directory of your CUBA project.
cd your_project_directory -
Connect to Bluemix (double check the domain name).
cf api https://api.eu-gb.bluemix.net -
Log in to your Bluemix account.
cf login -u your_bluemix_id -o your_bluemix_ORG -
Deploy your WAR to your Tomcat.
cf pushThe
pushcommand gets all the required parameters from themanifest.ymlfile. -
You can find Tomcat server logs via Bluemix WEB-interface in the Logs tab on the application dashboard, as well as in command line using the command
cf logs cuba-app --recent -
After the deployment process is completed, your application will become accessible in browser using the URL
host.domain. This URL will be displayed in the ROUTE field in the table of your Cloud Foundry Apps.