3.3. Creating Entities
Let’s create the Customer entity class.
-
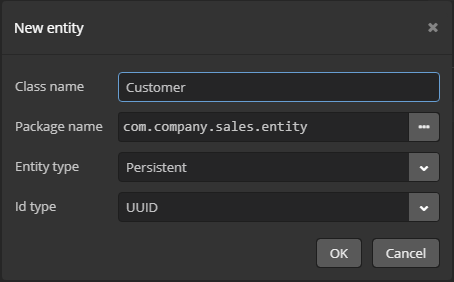
Go to the Data Model tab in the navigation section and click New > Entity. The New entity dialog window will appear.
-
Enter the name of the entity class –
Customer– in the Class name field.
-
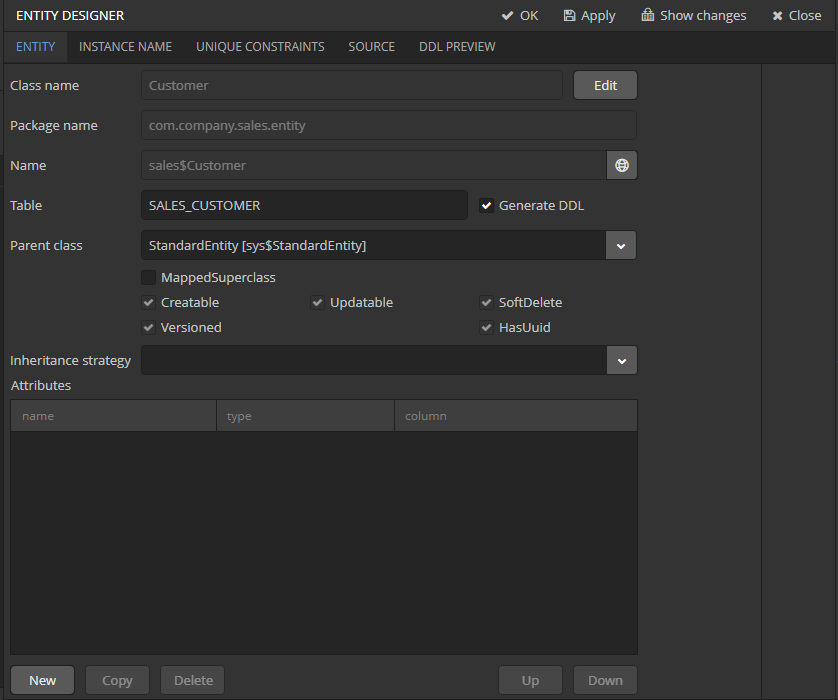
Click OK. The entity designer page will be displayed in the workspace.

-
The entity name and the database table name will be automatically generated in the Name and the Table fields respectively.
-
Leave the existing value –
StandardEntity- in the Parent class field. -
Leave the Inheritance strategy field blank.
Next, let’s create entity attributes. To do this, click the New button below the Attributes table.
-
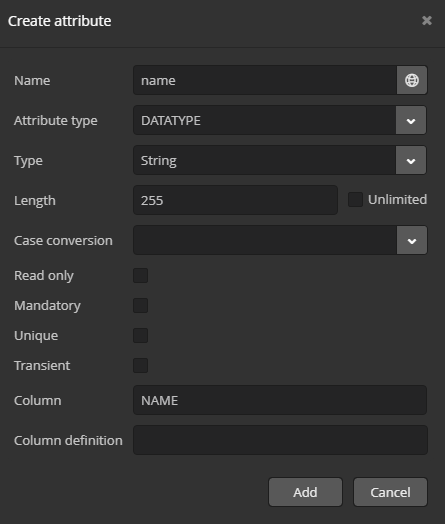
Create attribute window will appear. Enter the name of the entity attribute −
name, in the Name field. SelectDATATYPEvalue in the Attribute type list, specifyStringattribute type in the Type field and then set the length of the text attribute to 100 characters in the Length field. Check the Mandatory box. The name of the database table column will be automatically generated in the Column field.
Click Add to add the attribute.
-
emailattribute is created in the same way but the value in Length field should be set to50.
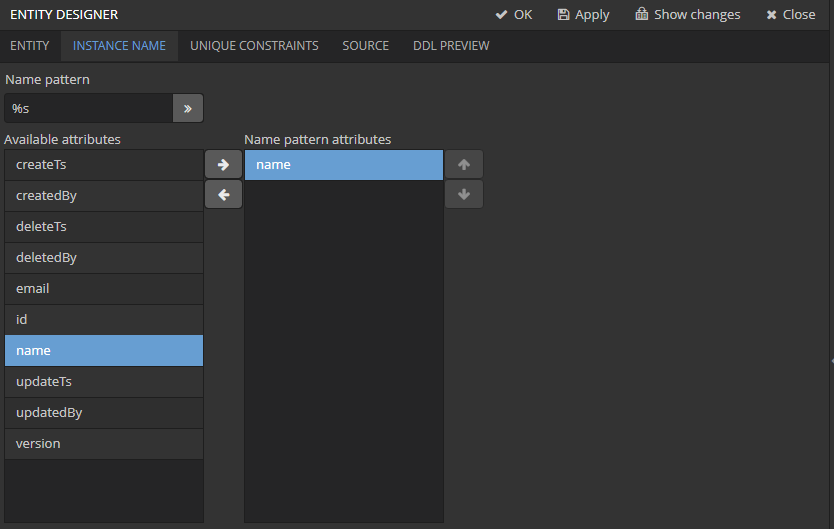
After creating the attributes, go to the Instance Name tab in the entity designer to specify the Name pattern. Select the name attribute in the Available attributes list and move it to the Name pattern attributes list by clicking the button with the right arrow on it.

Customer entity creation is now complete. Click OK on the top panel to save the changes and close the page.
Let’s create the Order entity.
Click New > Entity on the Data Model tab. Enter the Class name − Order. The entity should have the following attributes:
-
Name −
customer, Attribute type −ASSOCIATION, Type −Customer, Cardinality −MANY_TO_ONE. -
Name −
date, Attribute type −DATATYPE, Type −Date. Check Mandatory box fordateattribute. -
Name −
amount, Attribute type −DATATYPE, Type −BigDecimal.