6.2.3. WAR deployment to Tomcat Windows Service
-
Add the buildWar task to the end of build.gradle:
task buildWar(type: CubaWarBuilding) {
    appHome = './app_home'
    singleWar = false
    includeContextXml = true
    includeJdbcDriver = true
    appProperties = ['cuba.automaticDatabaseUpdate': true]
}
If the target server parameters differ from what you have on the local Tomcat used for fast deployment, provide appropriate application properties. For example, if the target server runs on port 9999, the task definition should be as follows:
task buildWar(type: CubaWarBuilding) {
    appHome = './app_home'
    singleWar = false
    includeContextXml = true
    includeJdbcDriver = true
    appProperties = [
        'cuba.automaticDatabaseUpdate': true,
        'cuba.webPort': 9999,
        'cuba.connectionUrlList': 'http://localhost:9999/app-core'
    ]
}
You can also specify a different
context.xmlfile to setup the connection to the production database, for example:task buildWar(type: CubaWarBuilding) { appHome = './app_home' singleWar = false includeContextXml = true includeJdbcDriver = true appProperties = ['cuba.automaticDatabaseUpdate': true] coreContextXmlPath = 'modules/core/web/META-INF/production-context.xml' } -
Run the
buildWargradle task. As a result,app.warandapp-core.warfiles will be generated in thebuild/distibutionsdirectory of your project.gradlew buildWar -
Download and run Tomcat 8 Windows Service Installer.
-
Go to the
bindirectory of the installed server and runtomcat8w.exewith the administrative rights. Set Maximum memory pool to 1024MB on the Java tab. Then go to the General tab and restart the service.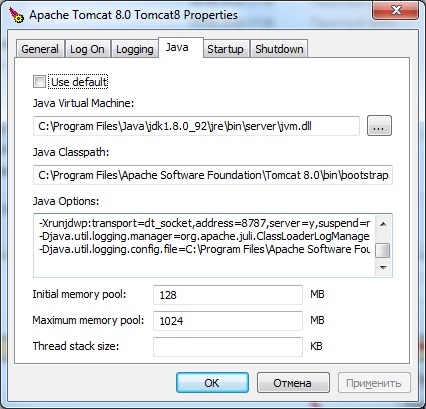
-
Add
-Dfile.encoding=UTF-8to the Java Options field. -
Copy the generated
app.warandapp-core.warfiles to thewebappsdirectory of the server. -
Start the Tomcat service.
-
Open
http://localhost:8080/appin your web browser.