3.1. Project Setup
-
Download and unzip the source repository of the library application, or clone it using git:
git clone https://github.com/cuba-platform/sample-library-cuba7
-
Open the Library project as described in the Opening an Existing Project section of the CUBA Studio User Guide.
-
Add the Full Text Search add-on to your project via CUBA Add-Ons window as described in the Installation section.
-
Create the database on the local HyperSQL server: click CUBA → Create database main menu item.
-
Run the application: click the
 button next to the selected
 CUBA Applicationconfiguration in the main toolbar. The link in the Runs at… section of the CUBA project tree will help to open the application in a web browser directly from Studio. -
Open the library application.
The username and password are
admin/admin. -
To enable full-text search functionality, open Administration → Application properties in the application main menu, find and open the
ftslist of properties in the table. Open the fts.enabled property using double-click and select true in the Current value field.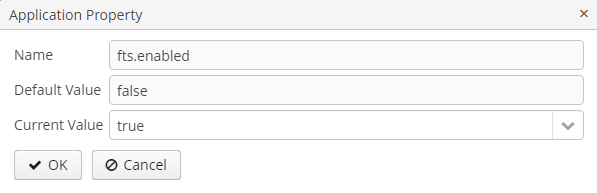 Figure 2. fts.enabled property
Once the steps above are completed, full-text search functionality will be added to the application and ready to work. If you log out of the system and then log in again, a search field will appear in the top right panel of the main application window. Full-text search can also be used in the Filter UI component.
However, search will not produce any results because the data has not been indexed yet.
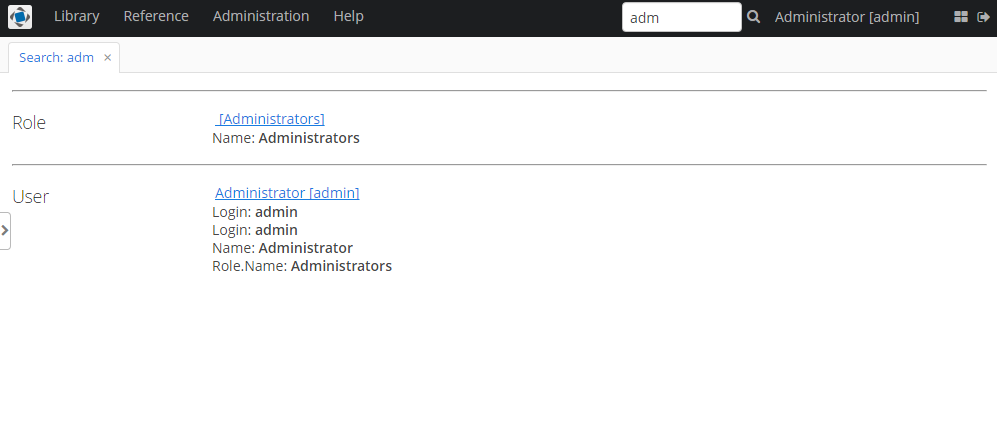
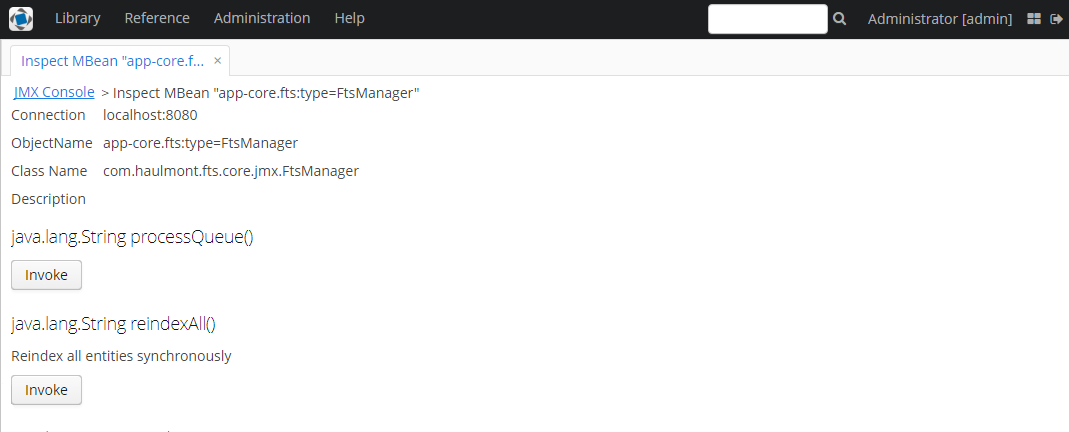
To start one-off indexing of the current state of the database (i.e. the entities listed in the FTS configuration file by default), open the Administration → JMX Console, find the app-core.fts:type=FtsManager JMX bean and consequently invoke reindexAll() first and then processQueue().
After this, searching the "adm" string should give the following results: