6.2.2. Users
Each system user has a corresponding instance of sec$User entity, containing unique login, password hash, reference to access group and list of roles, and other attributes. User management is carried out using the Administration > Users screen:
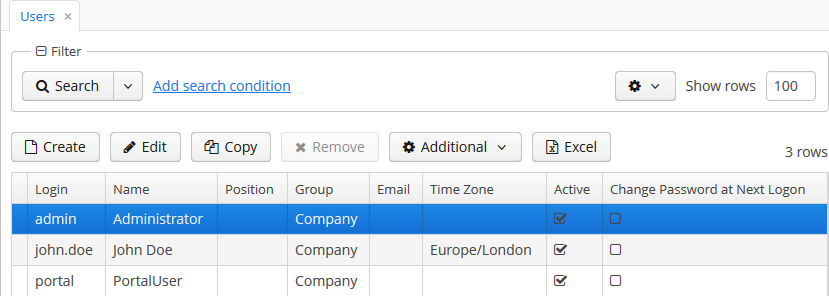
In addition to the standard actions to create, update and delete records, the following actions are available:
-
Copy – quickly creates a new user based on the selected one. The new user will have the same access group and role set. Both can be changed in the new user edit screen.
-
Copy settings – enables copying user interface settings from one user to several others. The settings include the table presentations, the SplitPanel separator position, filters and search folders.
-
Change password – allowing changing password for a selected user.
-
Reset passwords – enables performing the following actions on selected users:
-
If Generate new passwords flag is not selected in the Reset passwords for selected users dialog, the Change password at next logon flag will be assigned to selected users. These users will be asked to change the password on the next successful login.
In order to be able to change their passwords, the users must have permission to the
sec$User.changePasswordscreen. Keep it in mind when configuring roles, especially if you assign a Denying role to all users. The screen can be found under the Other screens entry in the role editor. -
If Generate new passwords flag is selected, new random passwords will be generated for selected users and displayed to the system administrator. The list of passwords can be exported to XLS and sent to related users. Additionally, the Change password at next logon flag will be set for each user, ensuring that users change the password on next login.
-
If Send emails with generated passwords flag is selected in addition to Generate new passwords, the automatically generated one-time passwords will be sent to corresponding users directly, and not shown to system administrator. The sending is done asynchronously so it requires a special scheduled task mentioned in section Sending Methods.
The template of password reset emails can be modified. Create custom templates in the core module, taking reset-password-subject.gsp and reset-password-body.gsp as an example. In order to localize templates, if needed, create files with locale suffixes, as it is done in the platform.
The templates are based on Groovy
SimpleTemplateEnginesyntax, thus you can use Groovy blocks inside of the template content. For instance:Hello <% print (user.active ? user.login : 'user') %> <% if (user.email.endsWith('@company.com')) { %> The password for your account has been reset. Please login with the following temporary password: ${password} and immediately create a new one for the further work. Thank you <% } else {%> Please contact your system administrator for a new password. <%}%>Data binding for these templates contains
user,password, andpersistencevariables. You can also use any Spring beans of the middleware if you importAppBeansclass and get them usingAppBeans.get()method.Having overridden the templates, in the
app.propertiesof the core module specify the following properties:cuba.security.resetPasswordTemplateBody = <relative path to your file> cuba.security.resetPasswordTemplateSubject = <relative path to your file>In a production environment, the templates can also be placed in the configuration directory and the properties can be added to the
local.app.propertiesfile.
-
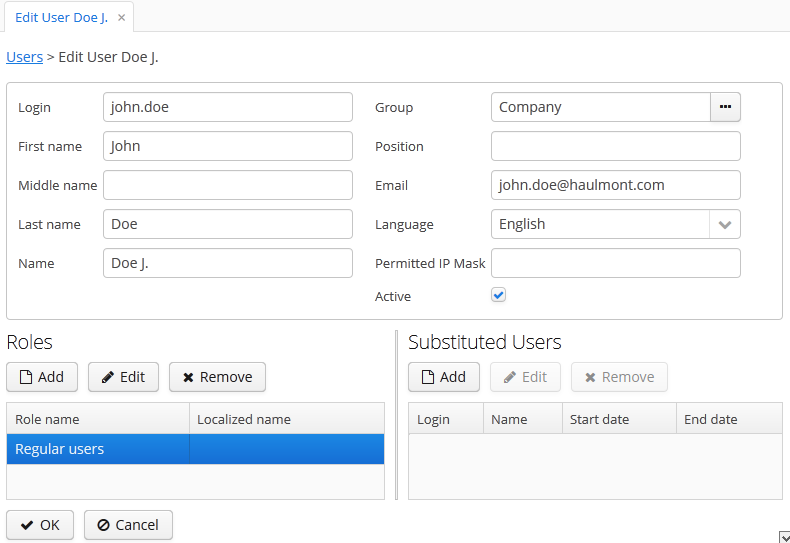
The user edit screen is described below:
-
Login – unique login name (required).
-
Group – access group.
-
Last name, First name, Middle name – parts of user’s full name.
-
Name – automatically generated user’s full name. Based on full name parts above and a rule defined in the cuba.user.fullNamePattern application property. The name can also be changed manually.
-
Position – job position.
-
Language – the user interface language that will be set for the user, if the ability to choose a language on login is turned off using the cuba.localeSelectVisible application property.
-
Time Zone – the time zone that will be used for displaying and entering timestamp values.
-
Email – email address.
-
Active – if not set, the user is unable to login to the system.
-
Permitted IP Mask – IP address mask, defining addresses from which the user is allowed to login.
The mask is a list of IP addresses, separated by commas. Both the IPv4 and IPv6 address formats are supported. IPv4 address should consist of four numbers separated with periods. IPv6 address represents eight groups of four hexadecimal characters separated with colons. The "*" symbol can be used in place of an address part, to match any value. Only one type of address format (IPv4 or IPv6) can be used in the mask at the same time.
Example:
192.168.*.* -
Roles – user roles list.
-
Substituted Users – substituted users list.