9.2.4. Roles
The role combines a set of permissions that can be granted to the user.
The user may have several roles, in which case a logical sum (OR) is devised from all of the assigned roles. For example, if a user has roles A, B and C, role A denies X, role B allows X, role C does not set explicit permissions on X, then X will be allowed.
If no user roles explicitly define permission on the object, the user will have the permission for this object. Therefore, the users have rights to all the objects if they have no roles that explicitly define the permission, or have at least one role that grants the permission.
|
Warning
|
If a user has a single role without explicitly set permissions, or does not have any roles at all, he will have all rights to all objects. |
The role list is displayed in the Administration > Roles screen. In addition to the standard actions to create, update, and delete records, the screen has the Assign to users button, allowing assigning the selected role to multiple users.
The role edit screen is described below. The role attributes are displayed in the upper part:

-
Name – unique role name or id (required). The name cannot be changed after the role has been created.
-
Localized name – user-friendly role name.
-
Description – arbitrary role description.
-
Type – role type, can be:
-
Standard – the role of this type grants only explicitly set permissions.
-
Super – the role of this type automatically grants all permissions. It should be assigned to system administrators, since it removes all prohibitions set by other roles.
-
Read-only – the role of this type automatically denies the permissions for the following entity operations: CREATE, UPDATE, DELETE. Therefore, the user with this role can only read the data and is unable to update it (unless there are other user roles explicitly allowing these operations).
-
Denying – the role of this type automatically denies the permissions for all objects, except entity attributes. In order to view or update something in the system, the user should be assigned an additional role that explicitly gives the necessary rights.
Permissions can be explicitly set for all the role types; for example, you can add the permissions to modify entities for the Read-only role. However, it does not make sense to prohibit anything for the Super role, because this special role type removes all prohibitions.
-
-
Default role – default role flag. All roles with this flag are automatically assigned to the newly created users.
The permission management tabs are described below.
-
The Screens tab configures screen permissions:
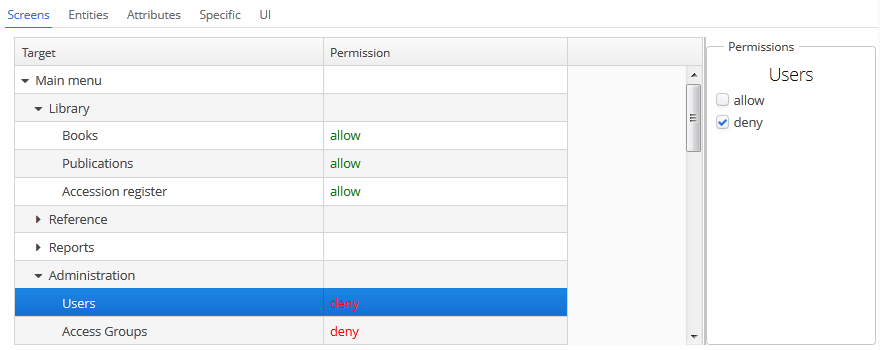
The tree in the left part of the tab reflects the structure of the application’s main menu. The last tree element is Other screens, which contains screens without a main menu item (for example, entity edit screens).
-
The Entities tab – configures entity operation permissions:
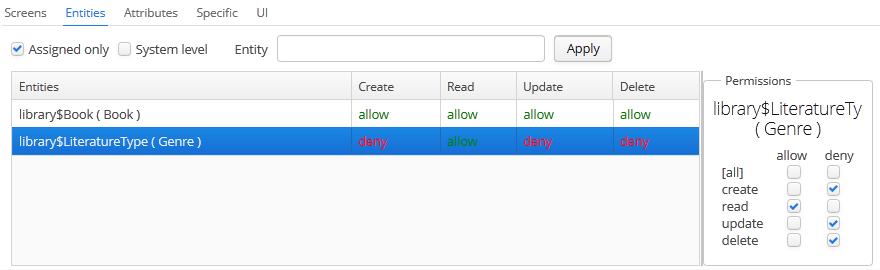
The Assigned only is selected by default, so that the table contains only the entities that have explicit permissions in this role. Therefore, the table for a new role will be empty. In order to add permissions, uncheck Assigned only and click Apply. The entity list can be filtered by entering a part of an entity name in the Entity field and clicking Apply.
System level checkbox enables viewing and selecting system entities marked with the
@SystemLevelannotation, which are not shown by default.When a constraint of this kind is violated, the error notification will be shown to the user. To localize the error messages, you should override the localization keys for the RowLevelSecurityExceptionHandler in the main message pack.
-
The Attributes tab – configures entity attribute permissions:
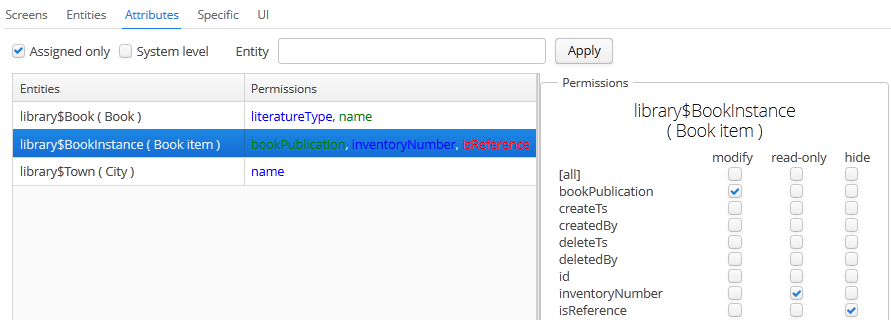
The Permissions column in the entity table shows the list of the attributes that have explicit permissions. The modify (full access) permissions are marked with green, read-only (read-only) – with blue, hide (the attribute is hidden) – with red.
Entity list can be managed similarly to the list in the Entities tab.
-
The Specific tab configures named functionality permissions:
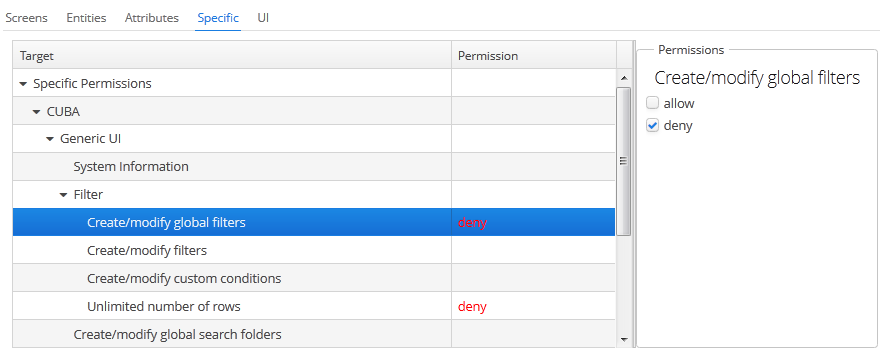
The permissions.xml project configuration file defines the object names to which specific permissions can be assigned.
-
The UI tab configures UI screen component permissions:
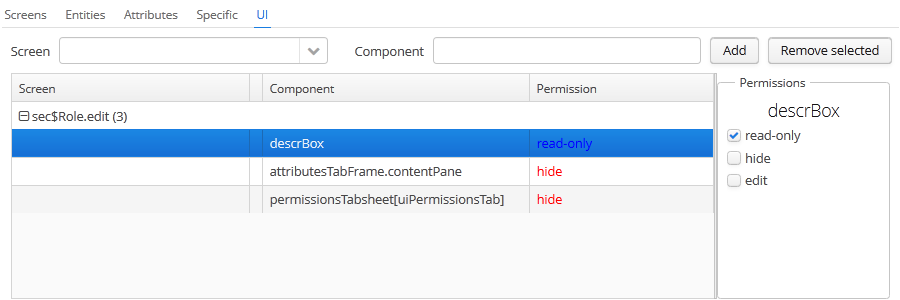
The permissions on this screen allow restricting access to any screen component, including the ones not associated with any data (for example, a container). The component identifiers must be known to create such permissions, therefore access to the screen source code is required.
In order to create a constraint, select the desired screen in the Screen drop-down list, specify the component path in the Component field, and click Add. Then set the access mode for the selected component in the Permissions panel.
The rules to forming the component path are listed below:
-
If the component belongs to the screen, simply specify the component identifier,
id. -
If the component belongs to the frame that is embedded within the screen, specify the frame identifier, and then the component identifier separated with period.
-
If configuring permission for the TabSheet tab or the FieldGroup field, specify the component identifier, and then the tab or field identifier in square brackets.
-
To configure permission for an action, specify the component, holding the action, and then the action identifier in angle brackets. For example:
customersTable<changeGrade>.
-